REMOVING CHROMATIC COLORS FROM THE SCANNED ORIGINAL BEFORE TRANSMISSION (DROP OUT COLOR)
Overview
You can erase a color area of the scanned original and send the processed original.

Operation

Place the original
Place the original in the automatic document feeder or on the document glass.

Specify the destination

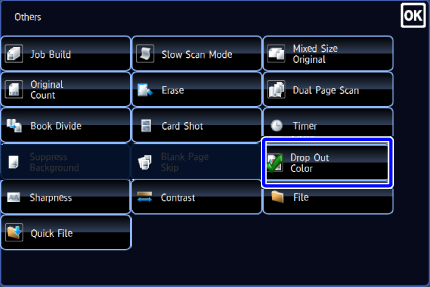
Tap the [Others] key, and tap the [Drop Out Color] key
A checkmark appears on the icon.
After the settings are completed, tap the [Back] key.

To cancel the Dropout Color setting:
Tap the [Drop Out Color] key to clear the checkmark.
Tap the [Start] key to start scanning of the original
If you inserted the original pages in the document feeder tray, all pages are scanned.
When you place the original on the document glass, scan each page one at a time.
After you have scanned the last original, tap the [Read-End] key.
A beep will sound to indicate that scanning and transmission have ended.
- Tap the [Preview] key to preview the output image before sending it. After you have scanned an original by tapping the [Preview] key, tap the [Additional Scan] key to scan the next original. Tap the [Start] key to start sending an image.
- If you tap the [Function Rev.] key on the scan confirmation screen, you can change the exposure, resolution, scan size, and send size.
- Tap the [Preview] key to preview the output image before sending it. After you have scanned an original by tapping the [Preview] key, tap the [Additional Scan] key to scan the next original. Tap the [Start] key to start sending an image.