MAKING A POSTER-SIZED COPY (MULTI-PAGE ENLARGEMENT)
Overview
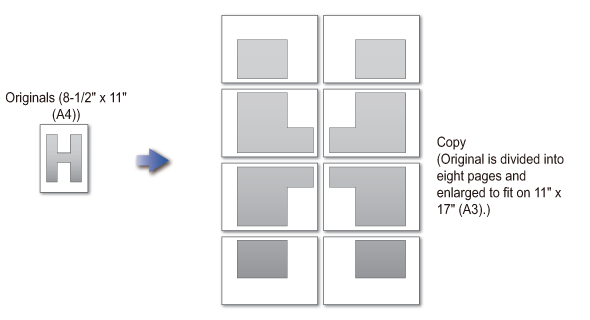
This function separately copies an enlarged original image on multiple sheets.


- Multi-Page Enlargement must be specified before scanning the original.
- Place an original on the document glass.
- Overlap of sections of image
- There will be a margin around the edges of each copy.
- Areas for overlapping the copies will be created at the leading and trailing edges of each copy.
- The paper size, number of sheets required for the enlarged image, and the ratio are automatically selected based on the selected original size and enlargement size. (The paper size and ratio cannot be selected manually.)
Operation

Tap the [Others] key, and tap the [Multi-Page Enlargement] key

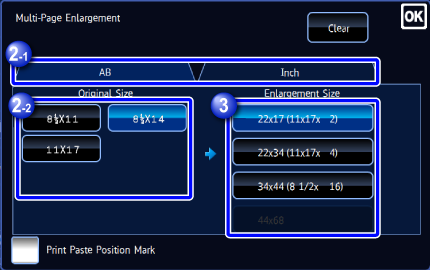
Tap the [AB] or [Inch] tab, and tap the key of corresponding original size
This displays the keys that show the available enlargement size, copy paper size, and number of sheets.
Tap the key of the size you want to enlarge the original to
After the settings are completed, tap and the [Back] key in sequence.
 When printing the copy image and margin border, set the [Print Paste Position Mark] checkbox to
  .
.
To cancel the multi-page enlargement setting:
Tap the [Clear] key.
Although the multi-page enlargement setting is canceled, the ratio selected automatically is kept valid.To return the ratio to 100%:
Tap the [Copy Ratio] key in the initial screen to display the ratio menu, and then tap the [100%] key.
Place the original on the document glass based on the orientation displayed on the screen, and tap the [Preview] key

Check the preview image in the preview screen

Tap the [Start] key to start copying

To make two or more sets of copies:
Tap the copies display key to specify the number of copies.