CHANGING THE SUBJECT, FILE NAME, REPLY-TO, AND BODY TEXT
Overview
You can change the subject, file name, reply-to, and body text when performing a scan transmission. If necessary, directly enter the text.

- When performing Scan to FTP, or Scan to Network Folder, only the file name can be changed.
- If the subject or file name is not changed, the settings in [Application Settings] → [Network Scanner Settings] in "Setting mode" are used.
- If the reply-to address is not changed, the settings in [System Settings] → [Image Send Settings] → [Scan Settings] → [Default Sender Set] in "Setting mode(administrator)" are used.
If this is not configured, the reply address configured in [Network Settings] → [Services Settings] → [SMTP] → [SMTP Settings] → [Reply E-mail Address] in the "Setting mode (administrator)" is used. - To configure the candidates for the subject, file name, and body text, select [Application Settings] and then [Network Scanner Settings] in "Setting mode".
Operation

To rename a subject, tap the [Subject] entry box
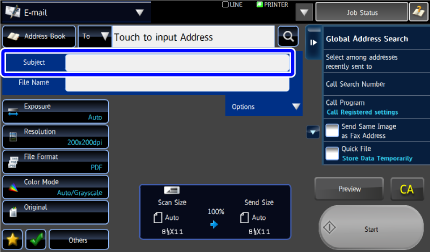

Tap a pre-set text key
After the settings are completed, tap .
.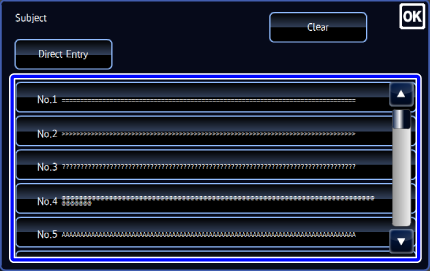

- A pre-set subject can be registered by selecting [Application Settings] in "Setting mode" → [Network Scanner Settings] → [Subject Name Settings].
- To directly enter text, tap the [Direct Entry] key to display the soft keyboard.
Enter the file name and tap the [OK] key.

To cancel the selected subject:
Tap the [Clear] key.
To rename a file, tap the [File Name] entry box
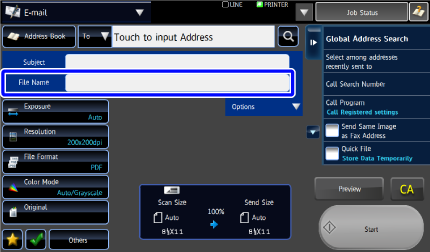

Tap a pre-set text key
After the settings are completed, tap .
.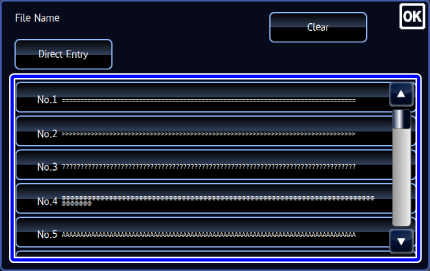

- A pre-set file name can be registered by selecting [Application Settings] in "Setting mode" → [Network Scanner Settings] → [File Name Settings].
- To directly enter text, tap the [Direct Entry] key to display the soft keyboard.
Enter the subject and tap the [OK] key.

To cancel the selected file name:
Tap the [Clear] key.
Tap [Options]

To change the reply address, tap the [Reply-To] entry box
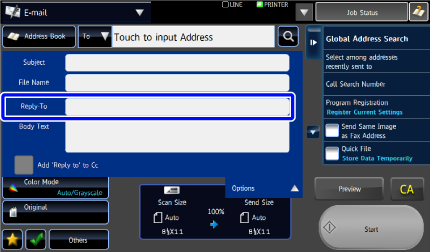

Tap the key of the destination you want to specify as the return address
After the settings are completed, tap .
.
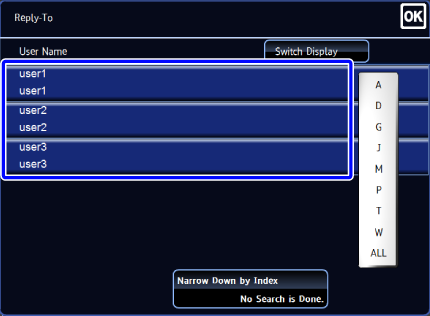

- If you tap the [Global Address Search] key on the action panel, you can specify a user stored in the global address book as the replay address.
- If you tap the [Call by User Number] key, you can retrieve an e-mail address by an appropriate number stored in the address book.
- If you tap the [Direct Entry] key on the action panel, you can directly enter an e-mail address.
- If you set the [Add 'Reply to' to Cc] checkbox to
 , the reply address is added to the Cc address.
 If user authentication is being used, the information of the user that logged in will be applied, and thus the reply address cannot be changed.
To change the body text, tap the [Body Text] entry box
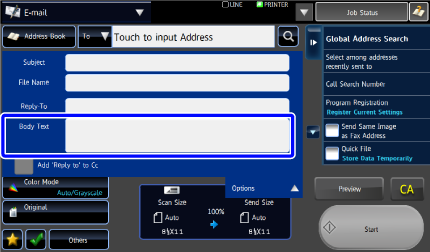

Enter the body text
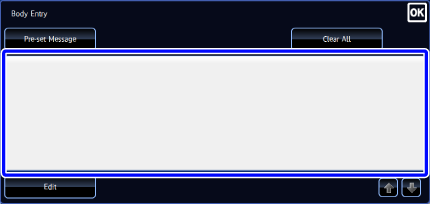
To select a pre-set text previously stored in the Setting mode, tap the [Pre-set Message] key.
To directly enter the body text, tap the [Edit] key. When the soft keyboard is displayed, directly enter the body text. After you have entered the body text, tap the [OK] key.
After the settings are completed, tap .
.

- A pre-set mail text can be registered by selecting [Application Settings] in "Setting mode" → [Network Scanner Settings] → [Message Body Settings].
- Enter up to 1800 characters. (A line break counts as one character.)
- To change the body text, tap the [Edit] key. The soft keyboard will appear with the text entered.

To clear all entered text:
Tap the [Clear All] key. When this key is tapped, the entire body of the message is erased immediately; not just the selected line.